Citrus has had ties to the winter holidays for a long time, and it's easy to imagine why when you bite into a juicy orange slice on a dreary winter's day. People started using dried citrus garlands as holiday décor to represent the returning of the sun after the winter solstice. I've always enjoyed the way these look: the perfect mix of rustic charm and natural color. They look especially magical with the sun or fairy lights shining through, so here's a fun DIY for your very own dried citrus ornament to brighten up your Christmas tree or windows!
Videos by Wide Open Country
How To Pick The Perfect Citrus Fruit
Frankie Larson
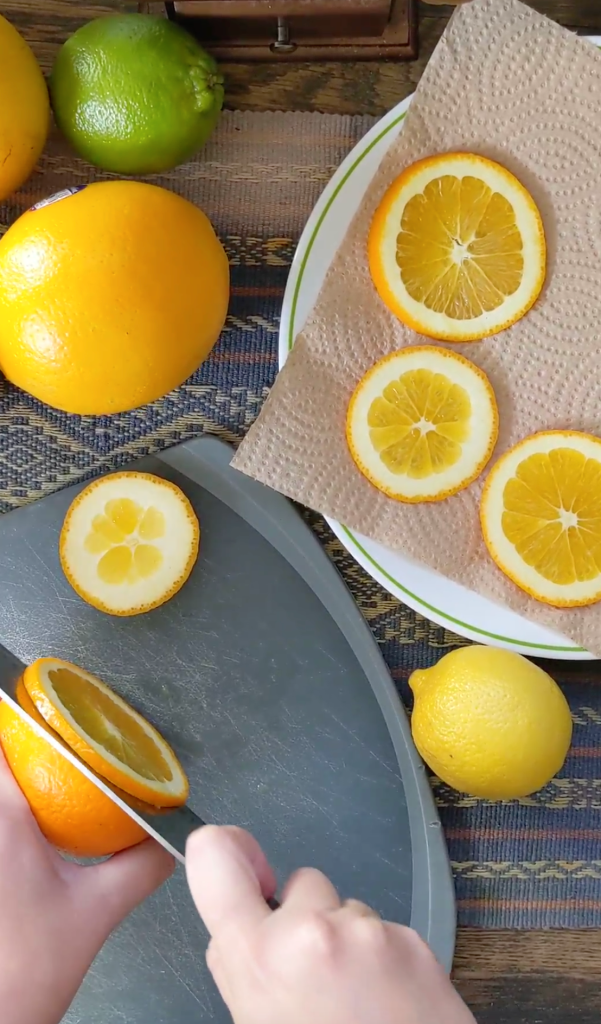
First, you have to pick out the right fruit for this Christmas decoration project. It's hard to go against your instinct here, but make sure to pick firmer fruit instead of ripe, squishy fruit. We're going for looks, not taste. I like to do a mix of citrus to get as much color as possible, including limes, blood oranges, grapefruit, and lemons along with your typical navel orange. I also like to have different size variations to create more dynamic pieces, so I usually do a few different oranges. Once you've properly annoyed the check-out person with your 10,000 different types of citrus, it's time to get started on your Christmas craft!
The key to a perfect dried citrus slice is to cut them as thinly and as evenly as your skill allows with a sharp knife or a mandoline. 1/2 inch slices are best for making dehydrated orange slices. This may take a little practice, and it's okay if they're a bit uneven, it just takes a bit longer to dry/ I like to put them on a plate with paper towels in-between each layer of slices as I cut, just to get some of the excess juice out.
How To Dry Orange Slices
After everything is sliced and you've eaten the delicious mistakes, put them on a baking rack above a baking sheet in a single layer. If you don't have a baking rack, put them on parchment paper so they don't get stuck and bake onto the cookie sheet. If you have a dehydrator, you're in luck - I can now officially say that this works really well, as I got to break out my brand new one for this project and was super pleased with the results! It's perfect for making dried fruits all year round.
Frankie Larson
The key to not caramelizing or burning your citrus slices is to dehydrate them low and slow. I bake them at 170°f but if your oven doesn't go that low, 200°f is fine. In the oven, it takes about 6-8 hours of drying time. In a dehydrator, 150°f at 8 hours was perfect for all my citrus slices except my plump grapefruit, which needed a few hours more. (They were really hard to slice thinly, okay??)


I flip them every hour, but that's probably because I'm so delighted by this process that I frequently like to check-in. You can flip them every few hours and they'll be just fine. The added benefit of this project is that your house will smell AMAZING, almost like you are living in a bowl of deliciously-scented potpourri. I put some cinnamon sticks in a simmer pot on the stove at the same time and instantly got in the holly jolly spirit.
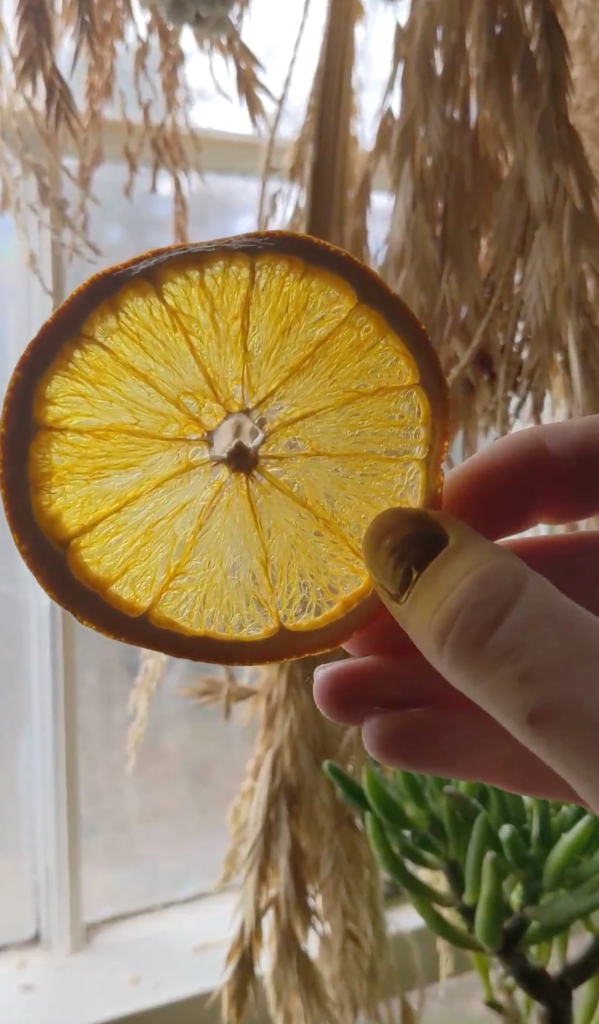
Once your citrus slices aren't sticky to the touch, they're done. Don't rush this process, especially if you mean to keep them - I mean it! Mine from last year ended up molding and I'm still upset about it. Now it's time to get into the designing!
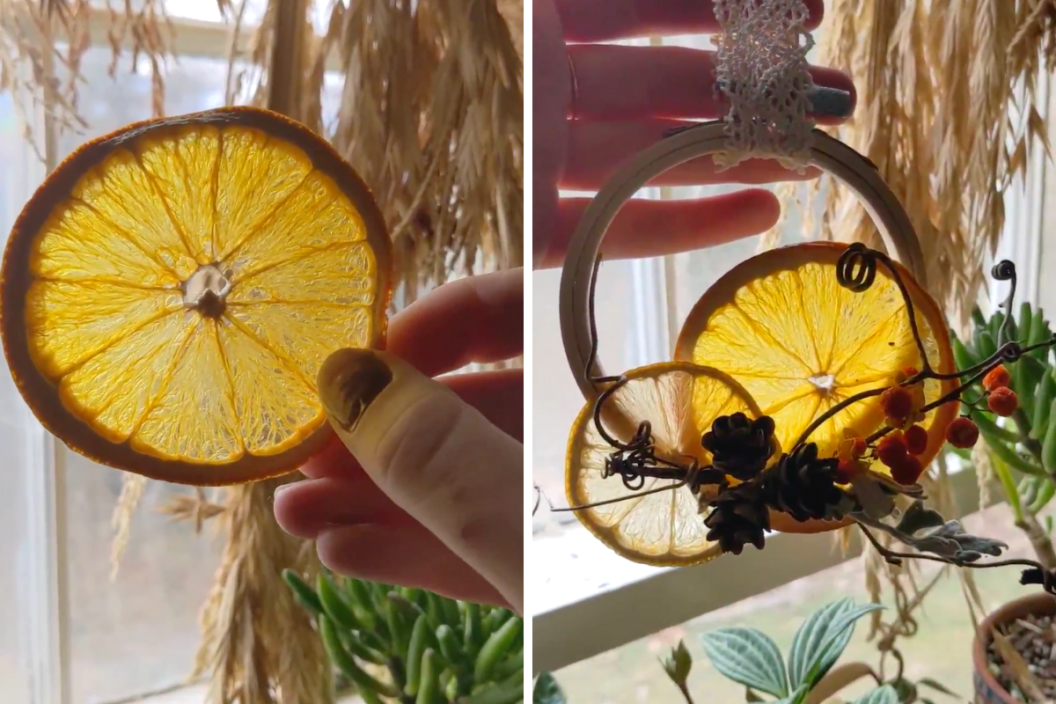
Turn Your Dried Orange Slices into Beautiful Décor
I can't recommend enough taking a walk around your yard. I found some really awesome things to use, including tiny pinecones, bittersweet berries, and cool, twisty grapevine pieces. At my business, Gathered & Golden, I love to use mostly foraged items to bring that mountain magic into my pieces. For this ornament, I used an embroidery hoop as a base. I like these because they're easy to find, highly customizable, and affordable.

Frankie Larson
Start with your biggest pieces: your dried orange slices. This will not only provide a base for everything else, but it will also allow light to shine through and look amazing. I use hot glue for this because it dries fast and makes designing easier. After the slices, add fun structural pieces and greenery. And finally, add your focal piece. For me, that was the adorable tiny pinecones. Uneven numbers make for a more visually interesting piece, as well as an A-symmetrical design. Finally, add your ribbon or twine to hang it and there you have it! A really cool, nature-inspired ornament to brighten up your home decor on the darkest days of the year.
Products featured on Wide Open Eats are independently selected by our editors. However, when you buy something through our links, we may earn a commission.
Frankie is a forager, writer, and maker most commonly found wandering around the Blue Ridge Mountains, in their mustard velvet reading chair, or elbow deep in their garden dirt. They enjoy taking time to connect with the natural world around them, and using this mountain magic to create pieces of art that celebrate the beauty of plants. Good luck trying to convince them that anything in this world is better than plants.